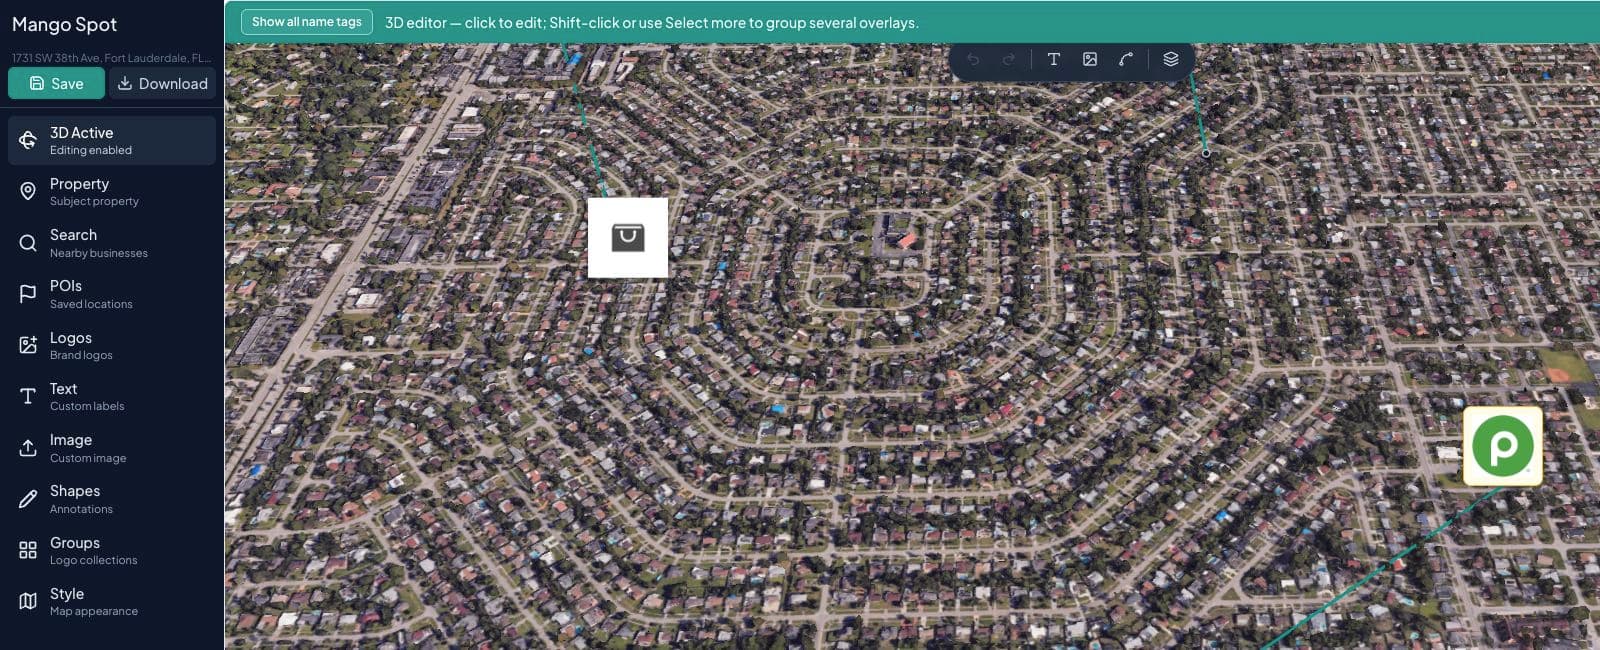
A photorealistic 3D retail map gives brokers a more immediate way to show a property's physical setting. Instead of looking straight down at a flat basemap, viewers can see building massing, parking fields, roads, terrain, and the surrounding retail environment from an angled aerial perspective.
CRE Retail Maps keeps the 2D and 3D versions of a project together. Your subject property, logos, leader lines, images, shapes, and text move with the project, so you can use whichever view tells the property's story best.
If you are evaluating the complete workflow around the 3D view, the retail map software overview explains nearby-business search, artwork review, styling, and every Pro export option in one place.
Before You Start
The 3D editor uses Google Photorealistic 3D Tiles and requires a desktop browser with WebGL2 support. For the smoothest editing experience, use a current version of Chrome, Edge, or Safari on a computer with hardware acceleration enabled.
Step 1: Create and Frame the Property Map
Create a map and enter the subject property's address. Start in the standard editor to confirm the location and add the overlays you need:
- Use Property to style and label the subject property.
- Use Search to find nearby businesses and select the results that matter.
- Use Logos for a specific brand or Image for a custom uploaded graphic.
- Use Text, Shapes, and Groups to add context and organize the composition.
Keep the first pass focused. A small number of recognizable anchors usually communicates more than a crowded field of logos.
Step 2: Open the 3D View
Select 3D View near the top of the editor sidebar. The photorealistic scene loads around the same subject property and brings your existing overlays into 3D.
If the 3D option is unavailable, confirm that you are on a supported desktop browser and that hardware acceleration is turned on.
Step 3: Set the Camera
Use the map controls to pan, orbit, tilt, and zoom until the site and the most important surrounding retailers fit comfortably in the frame. The saved camera angle is also the angle used for image export.
For a tighter, more useful image:
- Center the subject property first.
- Zoom in until empty terrain no longer dominates the frame.
- Use a moderate tilt so the viewer can still recognize roads and building footprints.
- Leave enough room around the property for the logos you want to feature.
Step 4: Edit Logos, Lines, and Name Tags
Click an overlay to open its 3D controls. Every selected overlay can be moved, edited with its type-specific modal, duplicated, or deleted. Non-shape overlays can show or hide a leader line. Only business overlays offer Change logo and per-item business name-tag visibility. To group in 3D, select at least two compatible business, image, or group overlays; Ungroup is available only when a group is selected.
Business name tags are hidden by default on new Nearby Places business overlays. Use Show all name tags in the teal 3D bar when the names add useful context, or Hide all name tags for a cleaner logo-only presentation. You can still control a single business name tag from that overlay's edit panel.
When several logos overlap, spread them around the subject property and use leader lines to preserve the connection to each reviewed map anchor.
Step 5: Add or Refine Content
You do not need to leave 3D to continue building the map. The regular sidebar tools remain available, and the floating toolbar gives you fast access to common editing controls. Any new logos, text, images, shapes, and groups are saved with the same project.
Use Save in the sidebar header before exporting. CRE Retail Maps also auto-saves during editing, but the saved confirmation is a useful checkpoint before a final download.
Step 6: Export the 3D Image
Select Download in the sidebar header, choose PNG or JPG, and set the output size. 3D image exports support custom dimensions from 200 to 4,096 pixels per side. The preview reflects your saved camera framing, overlays, and name-tag choices.
For a presentation or team review, 1,920 × 1,080 is a practical starting point. Use a larger custom size when the image will be placed across a full page or cropped in another design application.
PDF templates are also available for property marketing, but the photorealistic 3D scene is most flexible as a high-resolution PNG or JPG placed into an OM, flyer, pitch deck, or email.
When to Use a Photorealistic 3D Retail Map
A photorealistic 3D retail map is most useful when the property's physical setting contributes to the story. It can help a viewer understand relationships that are harder to read from a straight-down map, such as the placement of parking fields, the scale of nearby buildings, the shape of a retail corridor, or the way the site sits within the surrounding neighborhood.
Consider using 3D for:
- Shopping centers where parking and nearby building massing matter.
- Mixed-use districts where the relationship between buildings and retail is important.
- Properties where an angled aerial gives useful context beyond street labels alone.
Use the standard 2D view when street names, highway labels, and a clean diagrammatic layout are more important than physical depth. Many marketing packages benefit from using both views for different purposes.
3D Map Checklist
- The subject property is centered and immediately recognizable.
- The camera is close enough to show useful property detail.
- Only the most relevant retailers are included.
- Leader lines do not cross unnecessarily.
- Business name tags are either intentionally shown or intentionally hidden.
- The export preview has the right aspect ratio for its final use.
Related Guides
CRE Retail Maps Editorial Team
VerifiedCRE Software & Industry Analysis
The CRE Retail Maps editorial team produces in-depth analysis of commercial real estate technology, retail market trends, and broker workflows. Our content is reviewed by retail brokers and industry practitioners with decades of combined experience covering grocery-anchored, power center, and lifestyle retail across major US markets.