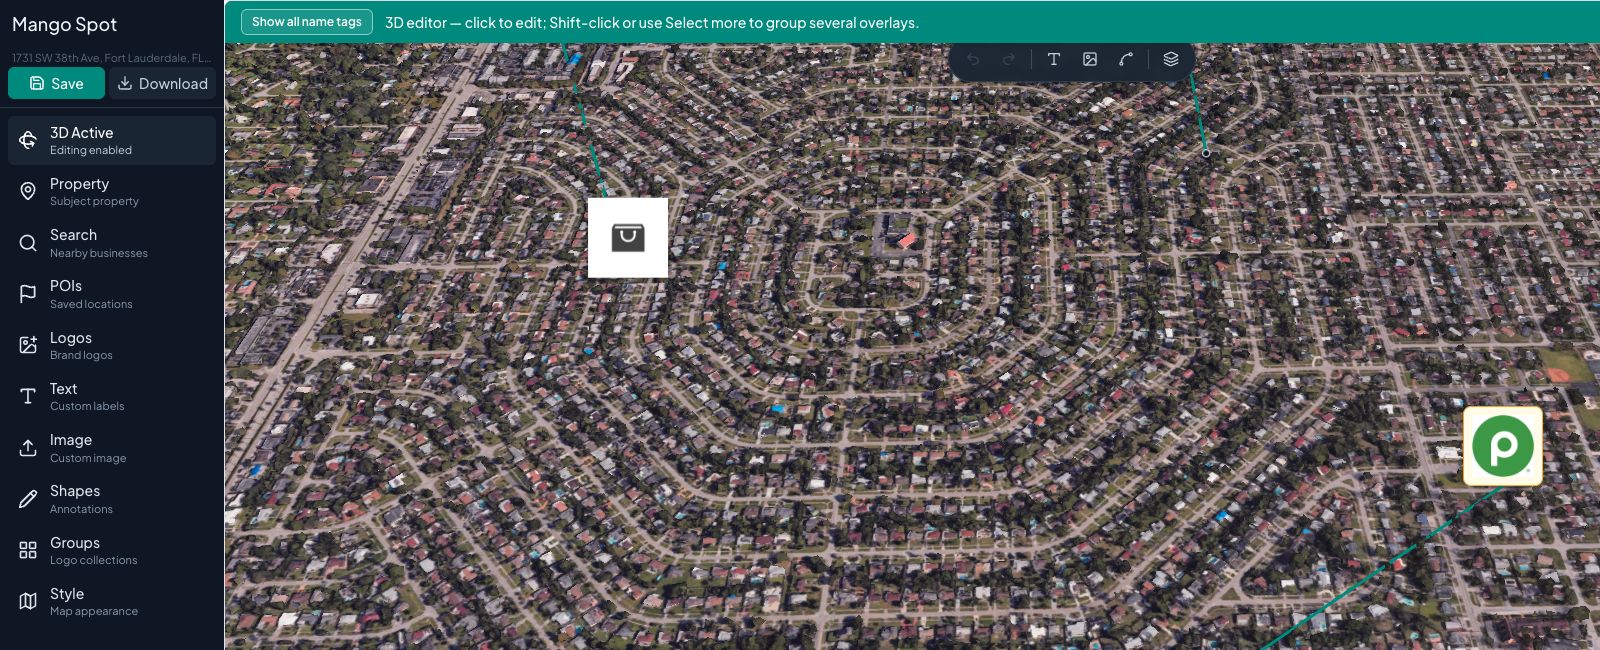
Before you start
Prepare and save a 2D map first. Use a browser with WebGL2 and hardware acceleration. The 3D control must be available in your editor.
Follow along
Step 1 of 5Open 3D View
Select 3D View in the sidebar when it is available. Wait for terrain and buildings to resolve before framing the scene.
Open 3D View
Select 3D View in the sidebar when it is available. Wait for terrain and buildings to resolve before framing the scene.
How-to 1
Prepare the project and open 3D
- 1
Start with a saved 2D map
Verify the subject property, important businesses, artwork, and anchors in 2D. Prepare detailed boundaries there when needed. A simple, reviewed composition is easier to evaluate in an angled scene.
- 2
Open 3D View
Use 3D View in the sidebar when available. Wait for the terrain and buildings to load before judging the result. If the control is absent, the feature is not available in the current editor configuration.
- 3
Allow graphics resources
Use a browser with WebGL2 and hardware acceleration. A complex scene can need more time and memory than 2D. If it fails to start, keep the saved project available and review the error before retrying.
How-to 2
Frame the scene around the property
- 1
Choose what the angle should explain
Decide whether the scene needs to show access, parking, nearby development, or terrain. Start with the subject in view and enough surrounding context to understand its position.
- 2
Adjust the view
Use the scene navigation to pan, orbit, tilt, and zoom. Make one change at a time so you can tell whether the direction, tilt, or distance improved the composition. Avoid a dramatic angle that hides the feature you want to explain.
- 3
Leave space for labels
Review the labels at the chosen angle. Keep important artwork from hiding entrances or buildings. Perspective can make a label appear close to a site even when its saved anchor is elsewhere, so verify the location independently.
- 4
Let the camera settle
Wait for the scene to stop moving and imagery to resolve before saving or opening Download. The saved camera is part of the project's 3D settings.
How-to 3
Select and edit an overlay in 3D
- 1
Select the item
Click a business, image, text, group, or the available shape edit marker. The selection panel identifies the selected overlay and shows the actions available for that type.
- 2
Use Edit
Click Edit to open the appropriate controls. Text editing includes Text box width and Rotation. Image and business editing can include Overlay size. Change the relevant appearance and use Save Changes.
- 3
Move through the camera center
To use Move to center, first frame the intended destination at the center of the 3D view, then select the item and click Move to center. Check the result and the line anchor afterward. Do not assume the 2D drag workflow is identical in 3D.
- 4
Duplicate or remove
Use Duplicate when you need another copy of the selected content, then reposition it. Use Delete to remove the selected overlays. Read the selection count before acting so you know whether the operation affects one item or several.
How-to 5
Select multiple items and create a group
- 1
Start a selection
Click one overlay. On desktop, Shift-click additional overlays, or use Select more overlays in the selection panel. The button changes to Select more: on while that mode is active.
- 2
Check the selected count
Read the panel heading before moving, duplicating, deleting, or grouping the selection. Use Clear 3D selection when you want to start over. Selection is separate from the content of an existing group.
- 3
Group compatible artwork
Select at least two compatible business, image, or group overlays. Click Group selected when it appears. Text and shapes are not the same type of logo collection. Inspect the new group and edit its title, columns, and width.
- 4
Ungroup when necessary
Select an existing group and use Ungroup to work with its items separately. Review their placement and anchors after ungrouping.
How-to 6
Use leader lines and shapes in the scene
- 1
Toggle a selected connector
Select a supported non-shape overlay and use Show line or Hide line. Check the endpoint against the intended site. Business lines use the shared style settings available through the relevant toolbar controls.
- 2
Add a starter shape
Choosing a shape from the sidebar in 3D creates a starter annotation at the camera center. It does not begin the 2D click-and-drag tracing flow. Select the shape to edit its appearance or reposition it using the supported controls.
- 3
Prepare precise visual outlines in 2D
Return to 2D for a polygon or path that needs to follow a specific footprint. Draw and verify it there, then reopen 3D to assess how the saved annotation reads in perspective.
How-to 7
Save, reopen, and export the scene
- 1
Save the complete scene
Check the camera, overlay arrangement, name tags, and line endpoints, then click Save and wait for confirmation. 2D and 3D are presentations of the same project, so edits to shared overlays matter in both views.
- 2
Verify persistence
Reopen the project and switch to 3D. Inspect the scene and important settings before using it as a final deliverable. A visual check after reopening is useful after major camera or grouping changes.
- 3
Download with Pro
Open Download, review the 3D preview, and choose supported image dimensions up to 4096px per side or a PDF template. Wait for the server render and inspect the downloaded file.
- 4
Return to the base map
Click 3D Active in the sidebar to return to the 2D editor. If the 3D scene fails to load, continue from the saved 2D project while checking browser graphics support and connectivity.
Check your result
The saved scene has a clear subject property, reviewed anchors and name tags, and a readable final camera angle.
Tips and troubleshooting
- If the 3D control is absent, that view is not available in the current editor configuration. Continue working in 2D.
- A blank or slow scene can indicate browser, graphics, or connection trouble. Reload the saved map after checking those requirements.
- 2D and 3D share the project. Verify leader-line anchors independently of the camera perspective.
Read the quick walkthrough as text
- Open 3D View. Select 3D View in the sidebar when it is available. Wait for terrain and buildings to resolve before framing the scene.
- Frame the camera. Pan, orbit, tilt, and zoom to show the property, access roads, parking, and relevant surrounding businesses. Leave room for labels.
- Review overlays and names. Select supported overlays to edit them. Use Show all name tags or Hide all name tags in the 3D toolbar to control business labels together; selected businesses also have individual name-tag controls.
- Save the scene. Click Save and wait for confirmation. Reopen the map to verify the camera and overlay state before relying on it for a presentation.
- Export or return to 2D. Download requires Pro. Review the 3D export preview and output dimensions, up to 4096px per side. Click 3D Active in the sidebar to return to 2D.
Explore the retail map software overview for the full workflow.