Before you start
POIs require Pro. Have the location name, address, and optional artwork ready.
Follow along
Step 1 of 4Open your library
Use My POIs in the main navigation and click Add New, or open POIs in the editor and click Add New POI.
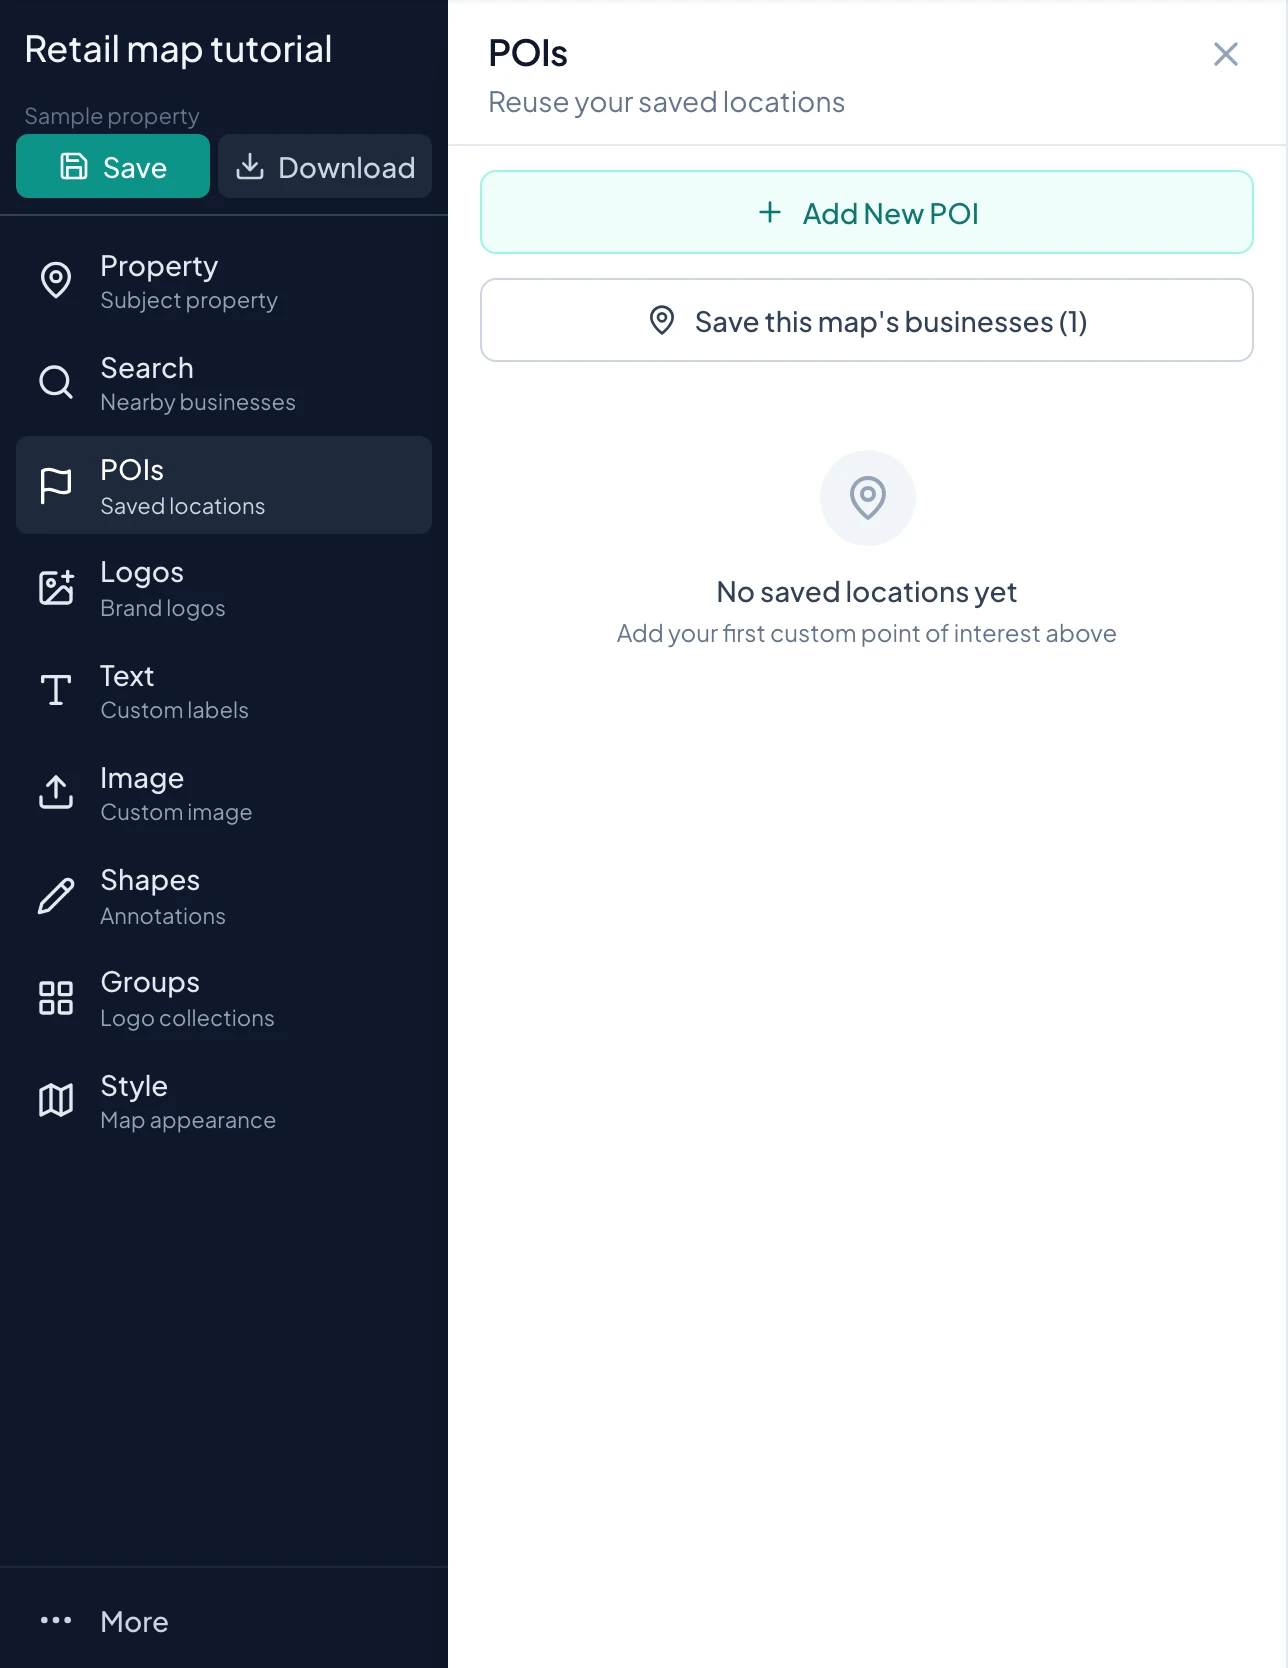
How-to 1
Understand what a saved POI contains
A point of interest stores a location name, address, coordinates, and optional artwork in your personal library. It is useful when you regularly map the same tenants or local destinations. POIs require Pro.
The library record and the overlays placed on maps are separate. Deleting a record from the library does not remove copies already placed on maps. Likewise, review older maps separately after changing a library record instead of assuming all existing compositions were updated.
How-to 2
Create a location from My POIs
- 1
Open the library page
Choose My POIs from the main navigation. Click Add New to open Add New Location. Use a name that distinguishes the branch, such as Juniper Coffee at Market Square, rather than only the chain name.
- 2
Enter and select the address
Type the street address and use autocomplete when available. Review the resulting address and location. Avoid saving an ambiguous name without checking which location it represents.
- 3
Add optional artwork
Upload a suitable logo if you want it ready for later placement. A useful name and verified location are still valuable when no suitable logo is available.
- 4
Save the record
Click Save Location. Wait for the save to complete and check the record in the library. Use the library search field to confirm you can find it by the name you expect to use later.
How-to 3
Create or edit a POI while working on a map
- 1
Open POIs in the sidebar
The editor panel shows your saved-location library. Use Filter saved locations to narrow the list or Add New POI to open the form without leaving the map.
- 2
Fill the form
Enter the location name, address, and optional logo. Check the branch identity and location before saving. Use Save POI for a new record.
- 3
Edit a saved record
Use the record's Edit control. Make the correction and click Update POI in the editor panel, or Update Location on the library page. Cancel closes the form when you do not want to apply the edit.
How-to 4
Place a saved location on another map
- 1
Open the destination map
Confirm the subject property and then open POIs. Filter for the saved location. Read its name and address so similarly named branches are not confused.
- 2
Place the record
Click the record or its place control. The overlay uses the saved coordinates and any saved artwork. If it lies outside the current view, inspect the map area before repeatedly clicking it.
- 3
Arrange and verify
Move the displayed label into clear space and check its leader-line anchor. Review the business information for the current project. A record saved months ago may need updating even if the stored location still displays correctly.
- 4
Save the map
Use Save and confirm completion. Reusing a record reduces repeated entry, but the map still needs its own save and final composition check.
How-to 5
Save businesses you already added to a map
- 1
Save one business
Reveal a business overlay toolbar and choose Save to My POIs. This action belongs to a business record, not every standalone image. Check the POIs panel to verify the record exists rather than relying only on brief button feedback.
- 2
Save the map's business set
Open POIs and use Save this map's businesses when it is shown. The action collects eligible business overlays; generic images, text annotations, and shapes are not equivalent location records.
- 3
Read the summary
Review the counts for newly saved, already saved, and failed records where reported. Do not interpret an already-saved count as a new copy. If some records fail, inspect the library before retrying.
How-to 6
Remove a library entry and maintain the collection
- 1
Choose the specific record
Search for the location and read its address. Open its Delete control. Confirm only after checking that it is the library entry you intend to remove.
- 2
Confirm or cancel
Use Delete in the confirmation state to remove the entry, or Cancel to keep it. Removing the library entry does not clean up copies that already appear on saved maps.
- 3
Review records periodically
Use branch-specific names and refresh outdated artwork or addresses. For a frequently used center, save each verified location once and use a group on individual maps when you need a combined tenant roster.
How-to 7
Troubleshoot a saved location
| Problem | What to check |
|---|---|
| POIs shows an upgrade prompt | Confirm that you are signed into the account with Pro access. |
| The wrong branch is placed | Review the record address and edit its location information before using it again. |
| A click appears to do nothing | The saved coordinate may be outside your current map view. Check the location before adding another copy. |
| Changing a POI did not change an old map | Inspect and update the old map separately. Library records are reused into map compositions. |
| The batch save has fewer records than the overlay count | It targets business records and can skip records already in the library. Generic artwork and annotations are not POIs. |
Check your result
A saved location is available in the POIs panel and can be placed on another map.
Tips and troubleshooting
- You can also use Save to My POIs on a business overlay. Recheck the business status, coordinates, and artwork when reusing it.
- Deleting a library record does not remove copies already placed on maps.
Read the quick walkthrough as text
- Open your library. Use My POIs in the main navigation and click Add New, or open POIs in the editor and click Add New POI.
- Save the location. Enter the name, select the address, and optionally add a logo. Use Save Location on the page or Save POI in the editor panel.
- Reuse on a map. Open POIs in the editor, filter your saved locations, then select a record to place it at its stored coordinates.
- Save businesses already on a map. The POIs panel offers Save this map's businesses when the map has business overlays. Review the saved and already-saved counts afterward.
Explore the retail map software overview for the full workflow.