Before you start
Pan and zoom to the area you want to search. Search results are suggestions and may be incomplete.
Follow along
Step 1 of 5Open Search
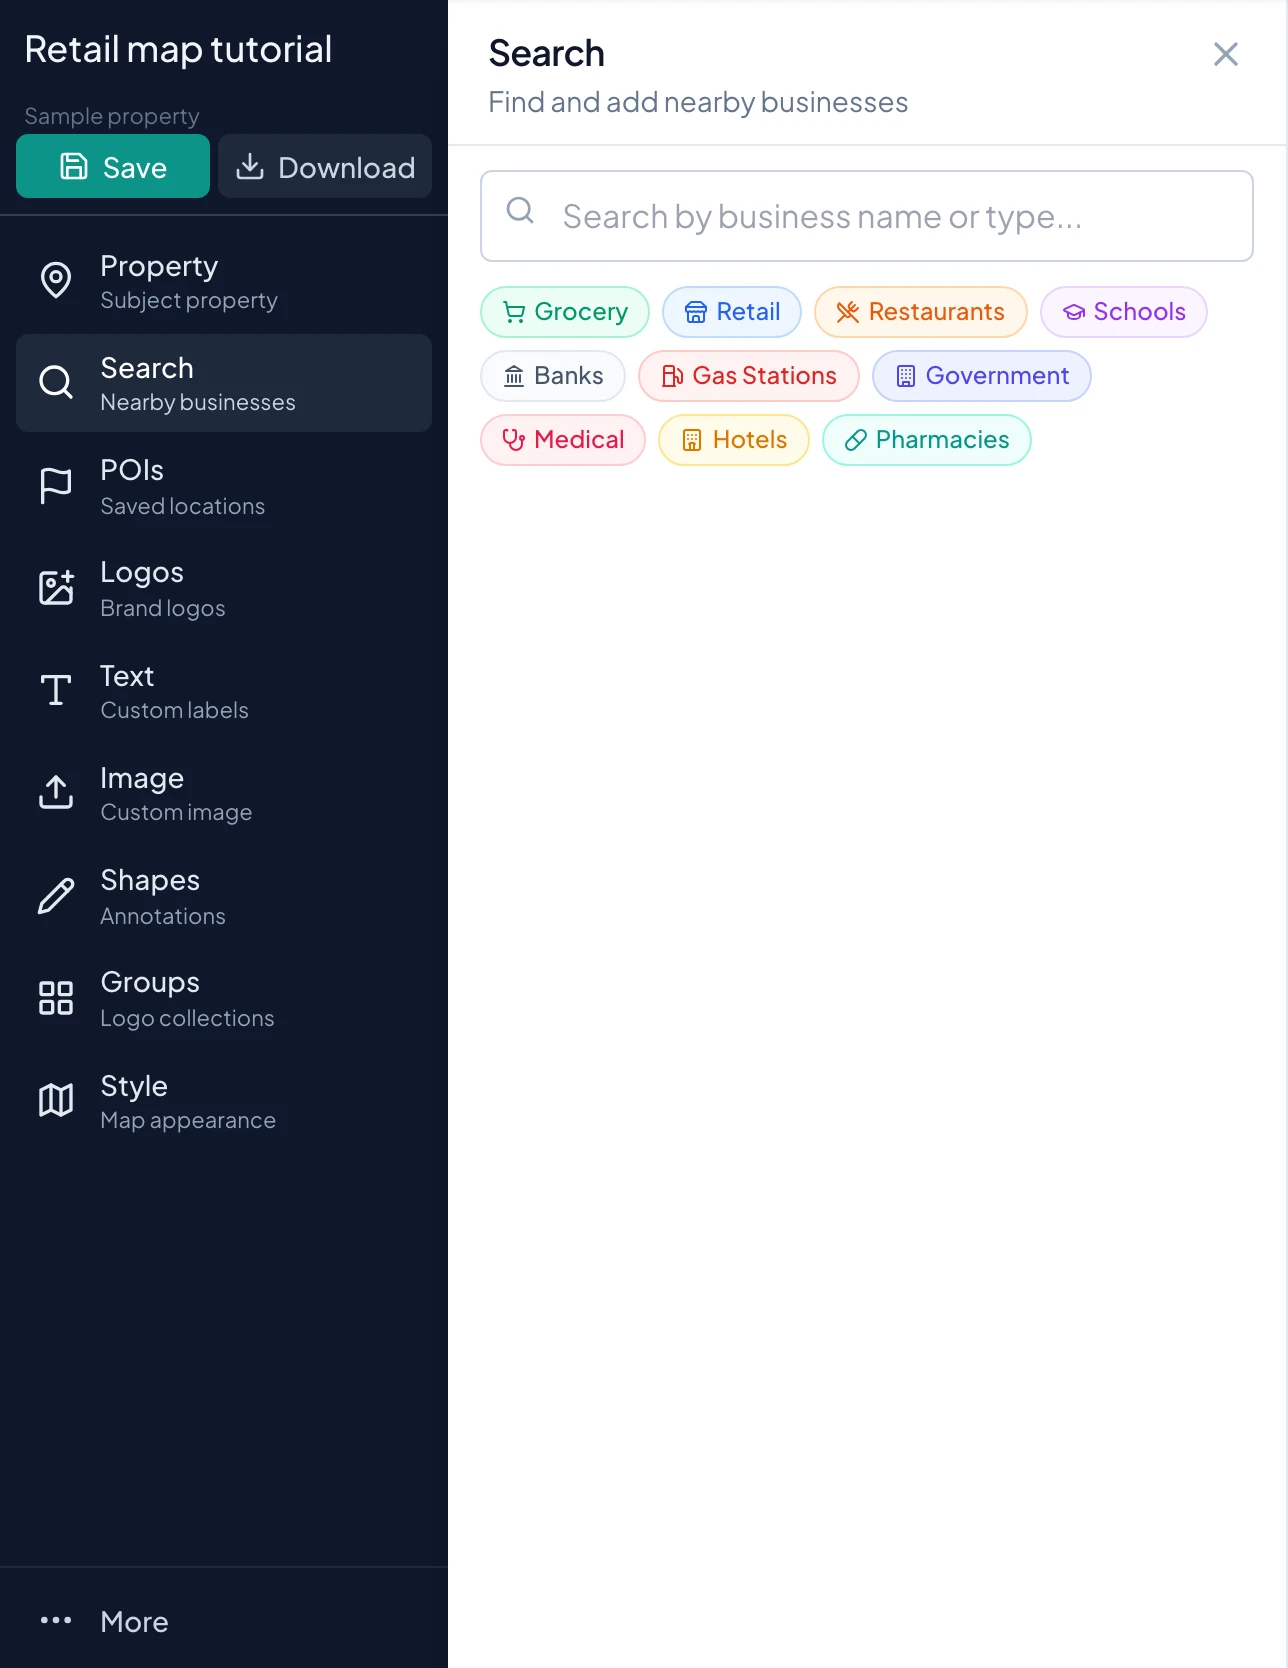
Click Search in the sidebar. Use the category controls or enter a business name or address.
How-to 1
Choose Search, Logos, or POIs
Use Search when the location matters: you want a particular storefront, bank, school, or other business around your subject property. It finds business records with a name, address, and coordinates. The artwork selection happens after you choose a record.
Use Logos for standalone brand artwork and POIs for a location you already saved. A brand can have many branches. Selecting a recognizable logo by itself does not establish which branch belongs on your map.
How-to 2
Frame the area and run a search
- 1
Set the area first
Open your map and pan or zoom to show the neighborhood you want to investigate. The search uses the visible bounds as a location bias. A bias is not a strict geographic boundary, so a returned business can still fall outside the area you intended.
- 2
Search by typing
Open Search. In Search by business name or type, type a name such as a grocery brand or a phrase such as coffee shop. Pause typing and wait for the results; this panel searches automatically after a short pause.
- 3
Search by category
Alternatively, click Grocery, Retail, Restaurants, Schools, Banks, Gas Stations, Government, Medical, Hotels, or Pharmacies. The selected category supplies the query. For a type without a category button, type it into the search field.
- 4
Refine the result set
If results are irrelevant, try a more specific business name or add the city or street to the query. If you change the map area, run the query again. Previously listed results should not be assumed to update just because you panned.
How-to 3
Read a result before adding it
Each result row shows a business name and address. When the map has a subject location, the row also shows an approximate distance from that subject. Results are ordered by proximity to the subject location when it is available.
- 1
Check the branch
Match the street and city, not just the chain name. Two branches of the same brand can both appear in the list. Include the branch that is relevant to the property story.
- 2
Interpret the distance
The displayed miles describe straight-line proximity, not a driving route, walk time, or trade-area calculation. A location across a highway can be close by distance but difficult to access. Use the address and road context when deciding whether to include it.
- 3
Confirm what you will claim
Search coverage and business status can be incomplete or stale. Verify an important anchor tenant or co-tenancy claim against your current project information before sharing the map. A result is a starting point for review.
How-to 4
Add one business with a logo or text
- 1
Click the row or add control
Click the business name or the add control in its row. Do not use its checkbox for this workflow. The Business Logo dialog opens for the selected business, including when no suitable artwork was found.
- 2
Choose an artwork candidate
Review Found Business Logos. Click the intended candidate to add it. Selection can place the artwork immediately, so inspect the candidate before clicking. Check the shape, lettering, and background, especially for brands with similar names.
- 3
Upload your own artwork
If the candidates are unsuitable, choose Upload Custom Logo and select the image you want to use for this business. This keeps the selected business location while using your file for its appearance.
- 4
Use the business name instead
Choose Use Text Only to add the selected business without a logo. This is useful for local businesses, unfamiliar brands, or a first layout pass. The text comes from the business record; use the standalone Text tool when you need a separate custom annotation.
- 5
Inspect the placed result
After placement, the dialog and search panel close and the result list clears. Find the new business on the map, check its anchor, and move its displayed label if it overlaps something. Reopen Search to add another business.
How-to 5
Place several reviewed businesses as text
- 1
Check the rows you want
Run a search, then use the checkbox beside each reviewed result. Clicking a checkbox adds it to the selection without opening the logo dialog. The footer shows how many results are selected.
- 2
Correct the selection
Uncheck a row to remove it. Click Clear to uncheck everything without placing the set. A new successful search resets the selection, so finish the current batch before searching for another category.
- 3
Place the selected set
Click Place N as Text, where N is the selected count. The app places business records using their names, then clears the search and closes the panel. It does not automatically choose a logo for every selected business.
- 4
Arrange the batch
Inspect all placed labels and move overlapping ones into open space. Verify each line endpoint independently. If a placement error occurs, inspect the map before retrying the whole set so you do not unintentionally add duplicates.
How-to 6
Change artwork and reuse a location
- 1
Change a placed business logo
Reveal the business overlay controls and choose Change logo. Review the new candidates, upload a file, or use the offered text option. Keep the branch location fixed while changing its presentation.
- 2
Separate artwork from the anchor
Drag the displayed artwork to a readable area. Use Toggle leader line to show its connector. Moving the artwork and moving the anchor serve different purposes: the first improves layout, while the second changes where the line points.
- 3
Save the business for later
With Pro, use Save to My POIs on the business overlay, or open POIs and use Save this map's businesses. Review the saved records before relying on them in another project. Save the map after finishing the arrangement.
How-to 7
Worked example: a grocery anchor and dining cluster
For a shopping-center overview, first search Grocery and add the reviewed anchor as a logo. Search Restaurants next, check three relevant results, and place them as text. This gives the anchor visual prominence while keeping the smaller businesses legible.
Move the dining labels into clear space, verify the endpoints, and shorten any separate custom annotations with Text. If the restaurant logos are important to the presentation, review and add them individually instead of expecting the batch operation to select artwork.
How-to 8
Troubleshoot search and placement
| Problem | Next action |
|---|---|
| No results or search error | Wait for the map to load, check connectivity, then try the full business name or a different query. |
| Results are in the wrong neighborhood | Reframe the map and search again. Review every address because bounds bias does not guarantee an exact boundary. |
| No logo candidates | Use Upload Custom Logo or Use Text Only in the Business Logo dialog. |
| Clicking a row opens a dialog instead of selecting a batch | Use the checkbox beside the row to select several. |
| A label is far from its intended branch | Compare the saved address and anchor with the intended location. Do not fix a wrong branch merely by moving its displayed logo. |
| The result list disappears after placement | That is the completed placement flow. Reopen Search and run the next query. |
Check your result
Only reviewed businesses are added, and every displayed label points to the correct location.
Tips and troubleshooting
- If a business is missing, check the search area and try its full name or address. Use Image or Text when suitable artwork is unavailable.
Read the quick walkthrough as text
- Open Search. Click Search in the sidebar. Use the category controls or enter a business name or address.
- Review the results. Check the name and address of each result. If the area is wrong, move the map and search again.
- Choose a business and its artwork. Select a result to open its logo choices. Review the match, upload an image, or use a text label. A suggested logo does not confirm the business identity or rights to use the artwork.
- Use text for batch placement. Select the results you want, then use Place as Text. The button includes the number selected. Batch placement uses text labels, so review artwork individually when you need logos.
- Arrange and verify. Move the displayed labels apart, check the leader-line anchors, then save. A logo can be moved away from its location to improve readability.
Explore the retail map software overview for the full workflow.