Before you start
Know which business you want to illustrate. Use Search when you need to locate a specific nearby storefront.
Follow along
Step 1 of 4Search for a business
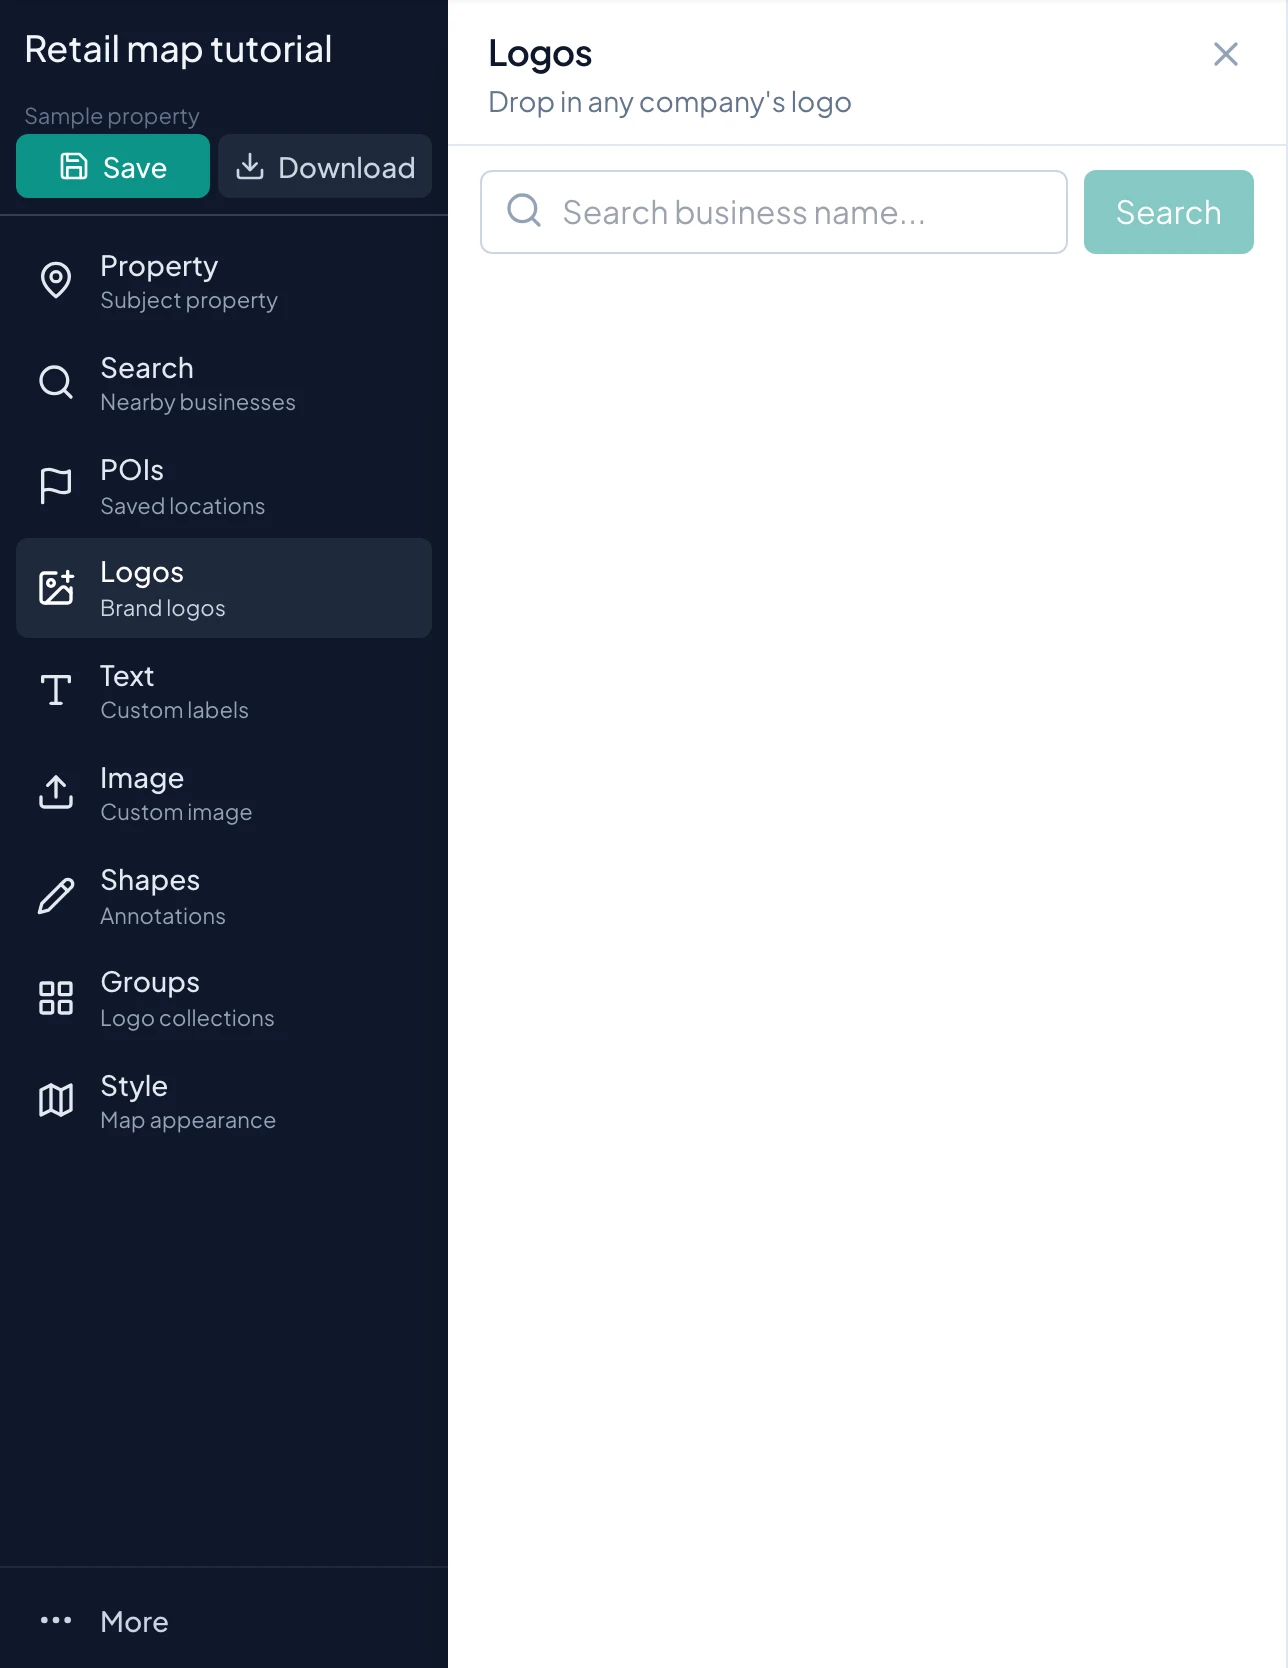
Open Logos. Type into Search business name and click Search.
How-to 1
Decide whether you need artwork or a business location
The Logos panel finds artwork through a business-name search and adds it as a standalone image overlay. This is useful for a tenant roster, a legend, or a branded label whose position you will arrange yourself.
Use Search instead when you need a specific storefront address and coordinates. A standalone logo does not become a verified business record simply because it looks like a familiar brand. POIs are the reusable location workflow for records you have already saved.
How-to 2
Search and choose a matching business
- 1
Enter the business name
Open Logos, type into Search business name, and click Search. Unlike the nearby Search panel, this panel has an explicit search button. Use the business or brand name you actually want to illustrate.
- 2
Choose a match
If several business matches appear, read the name and any displayed website domain, then click the intended one. A single match can open its logo results directly. Similar names do not necessarily refer to the same company.
- 3
Review the available artwork
Look at each candidate before selecting it. Check whether it is a symbol, full wordmark, or another variation. Choose an image that will remain recognizable at your intended display size.
- 4
Place the selected image
Click the candidate. The app adds it to the map using its image dimensions. Look for the new overlay in the current composition and position it yourself. Use Search if you also need to establish a branch location.
How-to 3
Resize and style the logo
- 1
Move the displayed artwork
Drag the logo into clear space. Avoid covering the subject marker, street labels, and other important overlays. If several tenants belong together, consider a group container instead of scattering the roster across the map.
- 2
Resize proportionally
Use the overlay resize handle. Judge the rendered lettering as well as the box size: two logos at the same outer dimensions can look very different if one file contains large blank margins.
- 3
Open Edit style
Reveal the overlay controls and click Edit style. Use Container Style to set fill, border, opacity, and padding. Try None for bare artwork, Minimal for a simple backing, or Dark for light artwork, then adjust the individual settings if needed.
- 4
Apply and review
Click Save Changes. Inspect the image at your export scale. A larger export does not add detail that was absent from the original logo, so replace a blurry source when possible.
How-to 4
Correct a logo or use your own image
- 1
For a business overlay, change its logo
A location-based business overlay offers Change logo. Use it to review replacement candidates or upload artwork without choosing another branch. Confirm the line anchor after you change the appearance.
- 2
For standalone artwork, add a replacement
If the standalone image is the wrong brand, use Logos or Image to add the intended artwork. Place and style the replacement, then remove the unwanted overlay with Delete. The business-only Change logo and POI controls are not universal image controls.
- 3
Use an uploaded source
Open Image and choose an image of 10MB or less, or use the upload option in a business logo dialog when working with a location. Use an image you can verify; do not select an unrelated candidate just to fill the space.
How-to 5
Build a logo roster for a center
- 1
Collect the tenant artwork
Add the reviewed logos needed for the roster. Keep a list of the intended tenants so a recognizable brand does not accidentally substitute for the correct occupant.
- 2
Group compatible overlays
Drag one compatible image, business, or group onto another and wait for Drop to group before releasing. Alternatively, open Groups and add the artwork there. Text and shape overlays do not join this type of collection.
- 3
Give the collection a purpose
Name the group Anchor Tenants or Shops and Dining, choose a readable column count, and check the title. Position the group near the relevant center and use a reviewed anchor if you add a connecting line.
How-to 6
Fix missing, blank, or unreadable artwork
| Symptom | How to fix it |
|---|---|
| No businesses found | Try the full business name, a simpler name, or Search for the specific location. |
| No logos found | Use an uploaded file or a text label. Search success does not guarantee suitable artwork. |
| White artwork disappears | Use a darker container fill and visible fill opacity, then review the preview. |
| A logo looks small inside a large box | The file may include whitespace. Prepare a tighter source image and replace it. |
| The logo looks blurry in the final file | Use a better source image and check the export at its actual viewing size. Print 2× cannot restore missing source detail. |
Check your result
Your selected artwork appears on the map at a readable size, with the correct identity and position.
Tips and troubleshooting
- No suitable result? Upload an image through Image or add a Text label. Verify the identity, image quality, and permission to use artwork before sharing.
Read the quick walkthrough as text
- Search for a business. Open Logos. Type into Search business name and click Search.
- Choose the matching business. When multiple matches appear, click the intended business to see its logos. A single match may open its artwork directly.
- Select the artwork. Click a suitable logo candidate to add it. The Logos tool adds artwork; verify its map position separately.
- Position and edit. Drag the artwork to position it. Use its resize handle and edit controls to adjust the presentation.
Explore the retail map software overview for the full workflow.